User management
Overview
Slingshot access control consists of two components:
- Role determines what visibility and actions a user has in Slingshot.
- Org determines which objects a user can access in Slingshot. When a role is assigned to the parent org, the role has access to all of its child units.
ℹ️
- To manage orgs, go to Configurations > Slingshot tags > Manage.
- To assign orgs to objects, go to Configurations > Slingshot tags > Assign.
When managing team access to Slingshot, you have two ways to assign roles in Slingshot:
- Map LDAP groups (via Support)
- Assign users (in the User Management page)
Organizations with established LDAP groups tend to manage which users belong to a LDAP group in their identity management system and map LDAP groups (via Support) to Slingshot roles. Organizations that would like more flexibility tend to assign users to Slingshot roles.
An “LDAP group” refers to a collection of users within a Lightweight Directory Access Protocol (LDAP) directory. Contact Support to map LDAP groups to roles in Slingshot or to make further changes.
Roles for managing users
- View all users and their assigned roles
- Tenant admin
- Snowflake admin
- Assign roles
- Tenant admin
- Snowflake admin
- Admin of a parent org can assign roles to their child units
Requirements
- Tenant admin role must be assigned by mapping LDAP groups. Users must belong to the LDAP group that is mapped to the role in Slingshot. (If you do not wish to map LDAP groups to other roles, tenant admin is the only LDAP group you need.)
Usage notes
- Approver roles can be assigned by either assigning users on the User management page or by mapping LDAP groups, but assigning users via a second method will override the previous assignments.
- For example, mapping LDAP groups and then assigning users on the User management page will override the previous LDAP group assignments. Learn more in the Approvals section.
- Roles that are neither Tenant admin nor Approver can be assigned to users on the User management page, by mapping LDAP groups, or both methods without overriding previous assignments.
- For example, if a user belonging to a LDAP group that is mapped to a role in Slingshot is also assigned a role on the User management page, the user gets both roles.
- Users who are assigned org roles (via the User management UI page) automatically receive org role-based email notifications.
- Access permissions for newly assigned roles are refreshed every hour, so users may need to wait an hour before they can view data accessible to elevated roles.
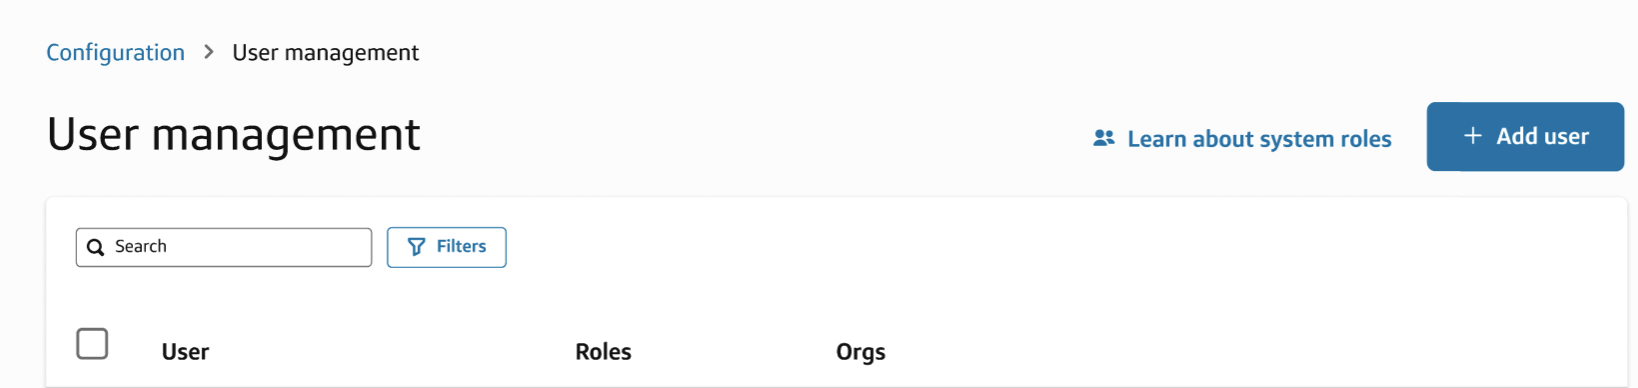
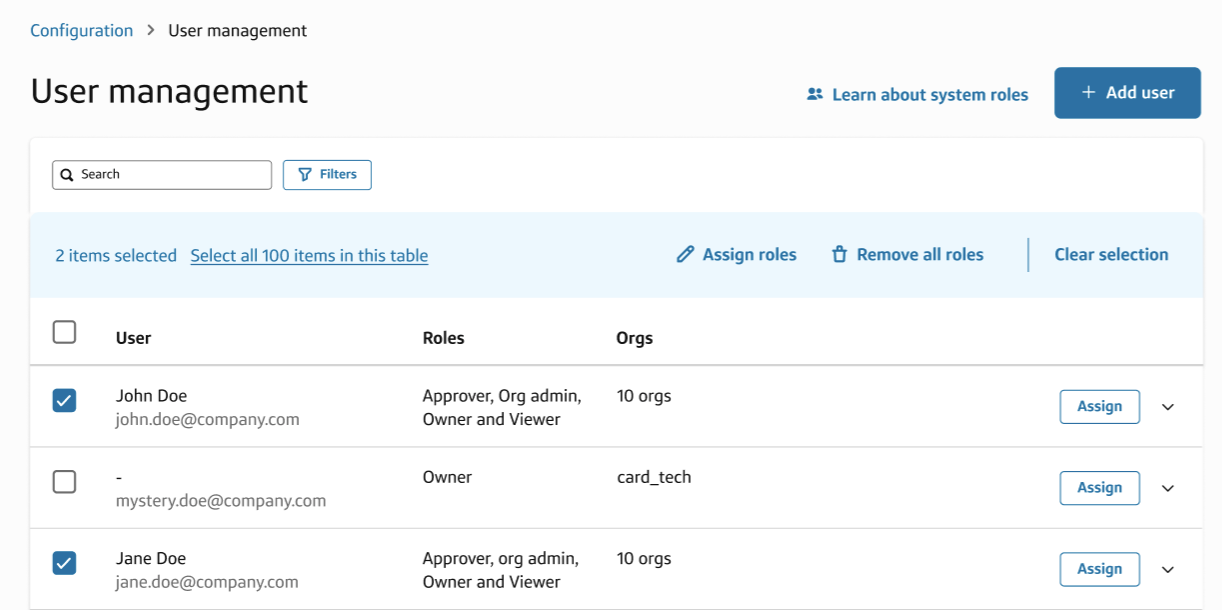
Manage users
Admins can manage users from the User management screen.
- Navigate to the Configurations screen.
- Select the Assign User Roles tile.
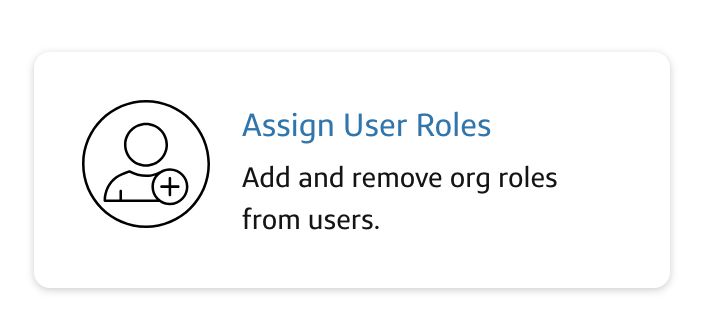 The User management screen displays.
Add users
To add users:
- Click Add user.
- Enter email addresses.
ℹ️If users have previously logged in to Slingshot, their email addresses should display in the table without you adding them.
- Click Add.
- (Optional) To assign user roles, pair the following Roles with Orgs:
- Approver 1
- Approver 2
- Owner
- Org Admin
- Viewer
Filter users
To filter users:
- Click the Filters button
- Filter by User name, User emails, Role, or Org.
- Click Done.
To filter users in bulk:
- Click the Filters button.
- Copy and paste a list of email addresses separated by commas or line breaks.
- Select Line break or Comma based on how you entered the bulk email addresses.
- Click Done.
Assign user roles
Assign roles to a single user
To assign roles to a single user, click Assign on a user line.
Assign roles to multiple users
To assign roles to multiple users:
- Select multiple users from the table on the User management screen.
- Click Assign roles.
⚠️New assignments overwrite current assignments.
- Pair a role with orgs:
- Approver 1
- Approver 2
- Owner
- Org Admin
- Viewer
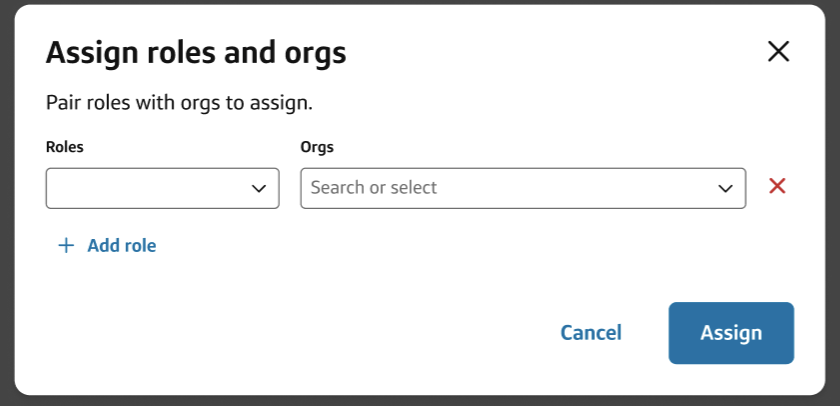
- Click Assign.
Remove or edit roles for a single user
To remove or edit role(s) for a single user:
- Click Assign on a user line.
- Modify the role and org pairing:
- To remove the role entirely, click the red X icon on the right of the role and org pairing.
- To edit role(s), select or search for different orgs to pair with the role.
- Click Assign.
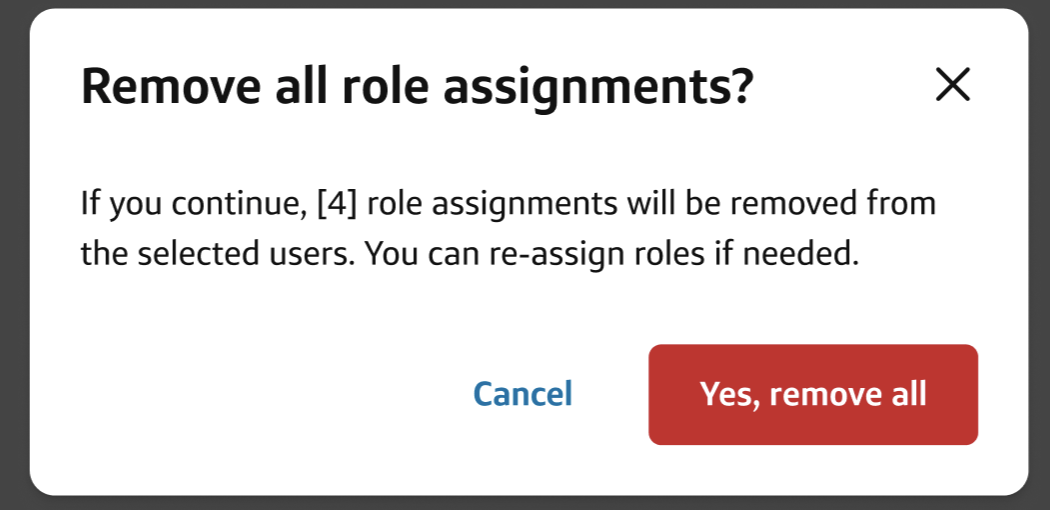
Remove all roles
To remove all roles from a single user or multiple users:
- Select the user(s) from the table on the User management screen.
- Click Remove all roles.